


The finished result this kit targets is simple: the Mac mini already sitting in your home office becomes the place every other computer in the house saves shared files and sends its Time Machine backups. It stays awake on a wired connection, keeps a dedicated desktop hard drive for backups and shared folders, rides out short outages on a battery backup, and shuts itself down cleanly when the battery runs low. No NAS box, no extra operating system to learn, and no subscription.
This method is for a home office with a spare or always-on Mac mini and two to four Macs or PCs that need a common file share plus network Time Machine backups. It is a narrower job than the full Turn a Mac Mini M4 Into a Tiny Home Server: The Complete Build Guide, and a different one from the Mac mini M4 Plex Server Kit with a Compact UPS, which is built around a media library. Here the work is plain SMB file sharing and macOS acting as a backup destination for other Macs.
Who should buy a NAS instead: anyone who wants drive redundancy (two or more disks that survive a single drive failure), more than a handful of always-on services, or storage that keeps running while the Mac is busy, rebooting, or being used as a daily desktop. If that sounds like you, read How to Use Time Machine with a Synology NAS or the simpler Synology BeeStation Review: A Personal Cloud Without the Subscription first.
What You Need
This is one compatible kit for a Mac mini you already own. Every item is a current Amazon US listing, and the specs below are the makers' listed figures, not lab results. The Mac mini itself is not on the list because this method assumes it is already on your desk. Bring a free power outlet near the router or the network jack, and a spare USB-C or USB-A port on the Mac for the UPS signal cable.
Backup and share drive
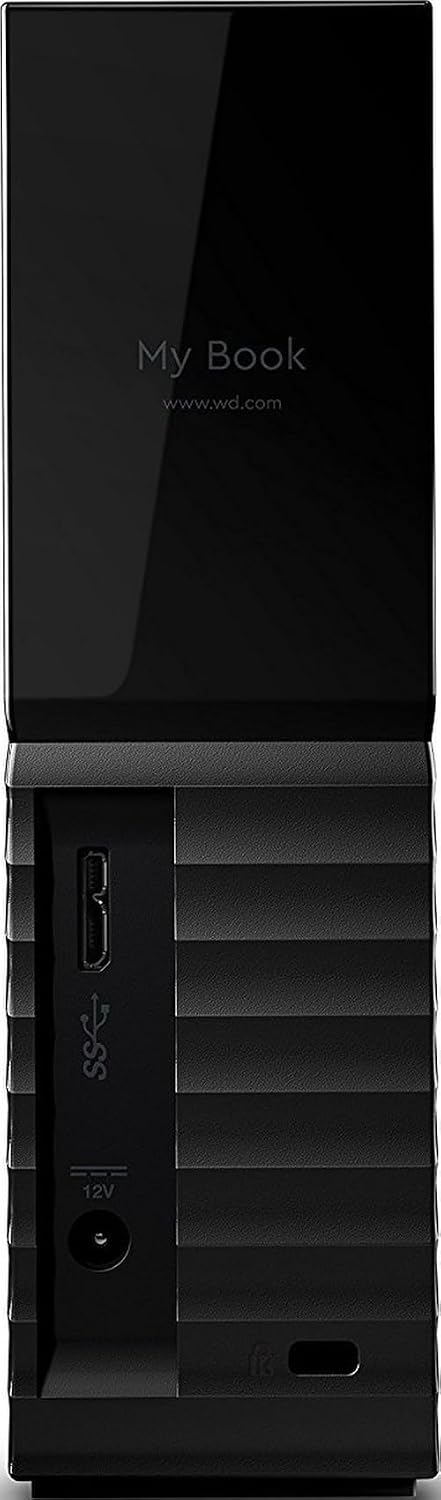
A 3.5 inch desktop hard drive is the right tool for this job. It has its own power adapter, so it does not depend on bus power from the Mac, and 8TB leaves room for several Macs' Time Machine histories plus a shared folder. The My Book connects over USB 3 (5Gbps), which is plenty for a single spinning drive. It also ships with WD's backup software and 256-bit AES hardware encryption, neither of which you need here: macOS handles both backups and encryption once the drive is erased as APFS.
Faster wired link (optional)
The Mac mini already has built-in Gigabit Ethernet, which is fine for Time Machine. The 2.5GbE adapter is worth adding only when you copy big project folders across the network and the other computers also have 2.5GbE ports or adapters. Plugable lists plug-and-play support for macOS and Windows, and the cable converts between USB-C and USB-A, so one adapter model can also go on a client PC.
Desk switch (optional)
Most home routers still have Gigabit LAN ports, so a 2.5GbE adapter alone does nothing unless the computers meet at a 2.5GbE switch. The TL-SG105-M2 has five 2.5G ports, is fanless, and needs no setup. Put the Mac mini, one or two client computers, and the uplink to your router on it. Skip it if every other device is on Wi-Fi or Gigabit.
Short patch cables
Short Cat 6 patch cables keep the desk tidy between the Mac mini, the adapter, and the switch. Use your existing longer run (or the wall jack) for the uplink back to the router.
Battery backup
A file server that loses power mid-write can corrupt a backup. The CP850PFCLCD is a pure sine wave unit with five battery outlets and five surge-only outlets, and CyberPower lists it for active PFC power supplies. Its USB cable lets macOS read the battery level directly, which is what makes automatic shutdown possible without extra software. See HID UPS for how that USB signal works.
What It Costs
About $600 as of writing for the full kit: roughly $330 for the 8TB drive, $170 for the UPS, $70 for the switch, $20 for the adapter, and $10 for the patch cables. Hard drive prices move a lot, so treat that as a ballpark. If the rest of your home office is on Wi-Fi or Gigabit, drop the adapter and switch and the core kit (drive, UPS, cables) comes to about $510.
Step-by-Step Setup
- Wire the Mac mini. Connect it to the router or the 2.5GbE switch with Ethernet instead of relying on Wi-Fi. If you add the Plugable 2.5G adapter, plug it into a USB-C port on the Mac, run a Cat 6 patch cable to the TP-Link switch, and leave the built-in Ethernet port empty so the Mac uses the faster link. System Settings > Network should show the adapter as connected. Reserve a fixed IP address for the Mac in your router so clients always find it.
- Prepare the drive. Connect the WD My Book to the Mac mini, open Disk Utility, and erase it as APFS with a GUID Partition Map. Create two folders on it, one named for Time Machine and one for shared files. If you want a hard boundary, add a second APFS volume instead of a folder and set a quota in Disk Utility's size options.
- Create a sharing account. In System Settings > Users & Groups, add a standard (non-admin) user that the other computers will sign in with. Give each family member or coworker their own account if you want separate permissions.
- Turn on File Sharing. Open System Settings > General > Sharing and turn on File Sharing. Click the info button, click Options, and make sure "Share files and folders using SMB" is on. If a Windows PC will connect, turn on the account under Windows File Sharing in the same dialog.
- Add the shared folders. Click the add button under Shared Folders and add both folders from the drive. Give the sharing account Read and Write access to the files folder.
- Make the Time Machine destination. Control-click the Time Machine folder in the Shared Folders list, choose Advanced Options, and turn on "Share as a Time Machine backup destination." Turn on "Limit backups to" and enter a size so backups cannot fill the drive and crowd out shared files.
- Point the other Macs at it. On each client Mac, open System Settings > General > Time Machine, click Add Backup Disk, pick the Mac mini's shared folder, and sign in with the sharing account. To reach the file share, use Finder > Go > Connect to Server and enter the Mac mini's address (smb:// followed by its name or IP). The first backup over the network takes hours; leave it running overnight.
- Keep the Mac awake. In System Settings > Energy, turn on "Prevent automatic sleeping when the display is off" and "Wake for network access," then turn on "Start up automatically after a power failure" (on newer macOS versions this appears as "Start up when power is connected," set to After power failure).
- Add the battery backup. Plug the Mac mini, the drive, the switch, and ideally the router into the battery outlets on the CyberPower CP850PFCLCD, not the surge-only side. Connect the UPS USB cable to the Mac. Once macOS sees it, Energy settings shows UPS Options, where you can shut down after a set time on battery, when time remaining falls below a threshold, or when the battery level drops below a percentage. Pick a few minutes on battery so the drive is idle well before the battery is empty.
- Test it. Copy a large folder from a client, confirm a Time Machine backup completes, then briefly unplug the UPS from the wall and watch the Mac stay up and report that it is on battery.
Mistakes to Avoid
Bottom line
For a home office that wants shared folders and Time Machine for a few Macs without buying a NAS, a Mac mini you already own, the WD My Book 8TB, and the CyberPower CP850PFCLCD cover the essentials, with the Plugable adapter and the TP-Link 2.5G switch as the optional speed upgrade. Keep it wired, keep it awake, and keep an offsite copy. View on Amazon for current pricing before you order.
Read next
- Turn a Mac Mini M4 Into a Tiny Home Server: The Complete Build Guide
- Mac mini M4 Plex Server Kit with a Compact UPS
- How to Use Time Machine with a Synology NAS
- Best Mac mini M4 Hubs and Stands in 2026
- Synology BeeStation Review: A Personal Cloud Without the Subscription
- Best 2.5GbE USB-C Ethernet Adapters for Laptops and Docks in 2026
- Best Compact UPS Units Under $150 for a Desk NAS in 2026

